Apple Cider Cheesecake
If you’re looking for a dessert that captures the essence of fall, look no further than this delightful Apple Cider Cheesecake! This recipe is a family favorite and has a special place in my heart. The creamy texture combined with the tangy apple flavor makes it perfect for cozy gatherings. Whether you’re hosting a holiday dinner or simply want to treat yourself on a chilly evening, this cheesecake is sure to impress.
What I love most about this Apple Cider Cheesecake is how easy it is to prepare. You’ll get that homemade feel without spending hours in the kitchen. Plus, it’s a fantastic make-ahead option, allowing you to enjoy more time with loved ones and less time worrying about dessert!
Why You’ll Love This Recipe
- Deliciously Unique Flavor: The reduced apple cider adds a tartness that perfectly balances the sweetness of the cheesecake.
- Simple Preparation: With just a few steps and ingredients, you can create something truly special without feeling overwhelmed.
- Perfect for Any Occasion: Whether it’s a family gathering or a quiet night in, this cheesecake fits right in.
- Make Ahead Convenience: Prepare it the day before and let it chill overnight for hassle-free entertaining!
Ingredients You’ll Need
Let’s talk about the ingredients! This Apple Cider Cheesecake uses simple, wholesome items that you might already have in your pantry. Together, they create a rich and flavorful dessert that’s sure to become your new go-to recipe.
For the Crust
- 2 cups digestive cookies or graham crackers (270g)
- ½ cup butter (melted) (113g)
- ¼ teaspoon salt
- 2 tablespoons powdered sugar
For the Filling
- 3 cups fresh apple cider (honeycrisp cider is more tart!)
- Mulling spices
- 3 cream cheese bricks (227g each, softened and at room temperature)
- 1 cup brown sugar (220g)
- ½ teaspoon salt
- 2 teaspoons pure vanilla extract
- 1 cup sour cream (240g)
- ⅓ cup reduced apple cider (from above)
- 1 teaspoon cinnamon
- 3 large eggs
- 2 tablespoons all purpose flour
Variations
This Apple Cider Cheesecake is wonderfully flexible! Here are some fun variations to try:
- Add a Nutty Twist: Mix in chopped nuts like pecans or walnuts into the crust for extra crunch.
- Spice It Up: Add extra spices such as nutmeg or ginger for additional warmth and flavor.
- Fruit Topping: Top your cheesecake with caramelized apples or fresh slices for a beautiful presentation!
- Dairy-Free Option: Substitute cream cheese with dairy-free cream cheese for a lactose-free version.
How to Make Apple Cider Cheesecake
Step 1: Boil the Cider
Start by boiling the cider with mulling spices in a large pot on high heat. Let it simmer down for about an hour until it thickens into syrup. This step is crucial because reducing the cider intensifies its flavor, giving your cheesecake that unique apple essence!
Step 2: Preheat and Prepare Your Crust
Preheat your oven to 350°F. In your food processor, pulse together the cookies until finely ground. Then add melted butter, salt, and powdered sugar. Pulse until everything combines into wet crumbs. Press these crumbs into an 8” round springform pan or lined cake pan. Bake for 10 minutes and let cool while you prepare the filling.
Step 3: Make the Filling
Lower your oven temperature to 325°F. In a stand mixer with a paddle attachment, beat together softened cream cheese and brown sugar until smooth—this might take some time, but it’s worth it! Then mix in sour cream, vanilla extract, salt, cinnamon, and your reduced cider mixture until creamy.
Step 4: Add Eggs & Flour
Next, gently mix in the eggs one at a time along with all-purpose flour until just combined—overmixing could lead to cracks later on!
Step 5: Bake Your Cheesecake
Place your springform pan inside a larger baking dish filled with hot water. Pour your creamy filling into the crust and bake for about 90 minutes. You’ll know it’s ready when the edges are set but still slightly wobbly in the center.
Step 6: Cool Gradually
Turn off your oven but leave the cheesecake inside with the door slightly cracked using a wooden spoon. Let it cool gradually—this helps prevent cracks from forming on top! After about 30 minutes, remove it from the oven and let cool completely on the counter before chilling it in the fridge for at least eight hours.
Now you have your own delightful Apple Cider Cheesecake ready to be enjoyed! I can’t wait for you to try this recipe; I promise it’s going to be loved by everyone who takes a bite!
Pro Tips for Making Apple Cider Cheesecake
Creating a delicious Apple Cider Cheesecake is all about attention to detail and some useful techniques! Here are some pro tips to help you achieve the perfect dessert.
-
Use room temperature ingredients – Bringing your cream cheese, eggs, and sour cream to room temperature before mixing will ensure a smoother and creamier texture in your cheesecake.
-
Don’t overmix the batter – Once you add the eggs and flour, mix just until combined. Overmixing can incorporate too much air into the batter, leading to cracks during baking.
-
Check for doneness carefully – The cheesecake should have a slight jiggle in the center when it’s done. If you wait until it’s completely set, it may become dry.
-
Cool gradually – Cooling your cheesecake slowly in the oven helps prevent cracking. That gentle transition from hot to cold is key in maintaining its smooth surface.
-
Chill overnight – For the best flavor and texture, allow your cheesecake to set in the fridge overnight. This resting period enhances the apple cider flavor and gives it time to firm up properly.
How to Serve Apple Cider Cheesecake
Serving your Apple Cider Cheesecake beautifully can make all the difference at gatherings or special occasions! Here are some delightful ideas on how to present this autumnal treat.
Garnishes
- Whipped cream – A dollop of freshly whipped cream on top adds a light touch and complements the rich flavors of the cheesecake.
- Caramel drizzle – Drizzling warm caramel sauce over each slice not only enhances flavor but also adds an attractive visual element.
- Cinnamon sprinkle – A light dusting of cinnamon or nutmeg on top provides a warm spice aroma that invites everyone to indulge!
Side Dishes
- Spiced apple slices – Thinly sliced apples sautéed with cinnamon and a hint of maple syrup create a sweet and tart contrast that pairs wonderfully with cheesecake.
- Vanilla ice cream – A scoop of creamy vanilla ice cream adds richness and balances out the tanginess of the cheesecake perfectly.
- Autumn fruit salad – A fresh mix of seasonal fruits like pears, cranberries, and pomegranates provides a refreshing contrast to the dense cheesecake.
- Coffee or chai tea – Offering a warm beverage like coffee or chai tea enhances the cozy experience, making each bite even more enjoyable as you savor this delightful dessert.
Enjoy crafting this luscious Apple Cider Cheesecake, and remember that sharing it with family and friends makes it even sweeter!
Make Ahead and Storage
This Apple Cider Cheesecake is not only delicious but also perfect for meal prep! You can make it in advance, allowing the flavors to develop even more while saving you time on the day of your gathering.
Storing Leftovers
- Wrap the cheesecake tightly with plastic wrap or aluminum foil.
- Store it in the refrigerator for up to 5 days.
- For best taste, enjoy within the first few days after making.
Freezing
- Allow the cheesecake to cool completely before freezing.
- Wrap it tightly in plastic wrap and then in aluminum foil to prevent freezer burn.
- Freeze for up to 3 months; be sure to label and date it!
- Thaw in the refrigerator overnight before serving.
Reheating
- This cheesecake is best served chilled and does not need reheating.
- If you prefer a slightly warmer slice, let it sit at room temperature for about 30 minutes before serving.
FAQs
Here are some common questions about Apple Cider Cheesecake that might help you out!
Can I use store-bought apple cider for this recipe?
Absolutely! Store-bought apple cider works well. However, reducing fresh cider gives a deeper flavor, enhancing your Apple Cider Cheesecake.
How long does the Apple Cider Cheesecake need to set in the refrigerator?
It’s best to chill your Apple Cider Cheesecake for at least 8 hours before serving. This allows it to firm up perfectly and enhances its flavor!
Can I substitute ingredients in this recipe?
Yes! You can use gluten-free cookies for the crust or swap sour cream with Greek yogurt if desired. Experimenting with these variations can lead to delightful results!
Final Thoughts
I hope you find joy in creating this Apple Cider Cheesecake! It’s a wonderful blend of creamy, tangy flavors that truly captures the essence of autumn. Whether you’re enjoying it with family or sharing it at a gathering, it’s sure to be a hit. Happy baking, and may your kitchen be filled with warmth and love as you whip up this delightful dessert!
Apple Cider Cheesecake
- Prep Time: 20 minutes
- Cook Time: 90 minutes
- Total Time: 1 hour 50 minutes
- Yield: Serves approximately 12 slices 1x
- Category: Dessert
- Method: Baking
- Cuisine: American
Description
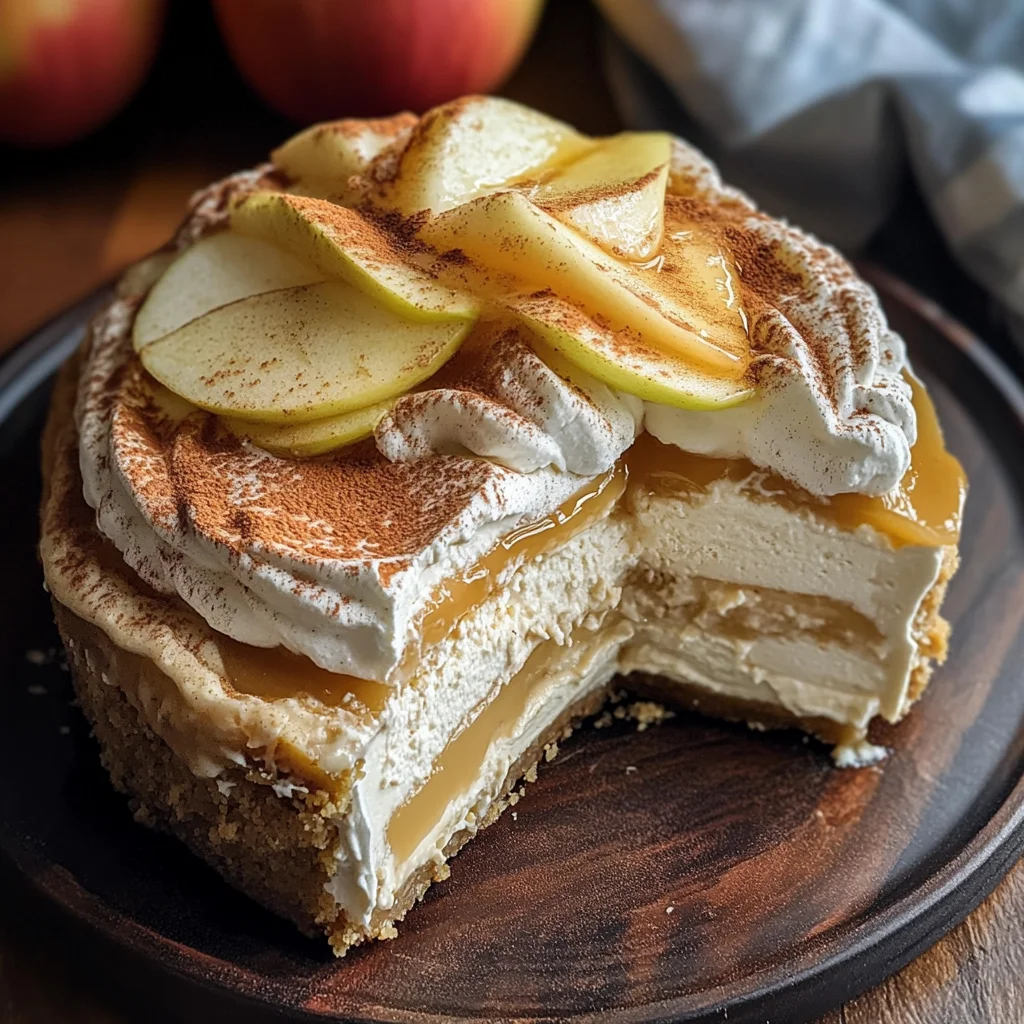
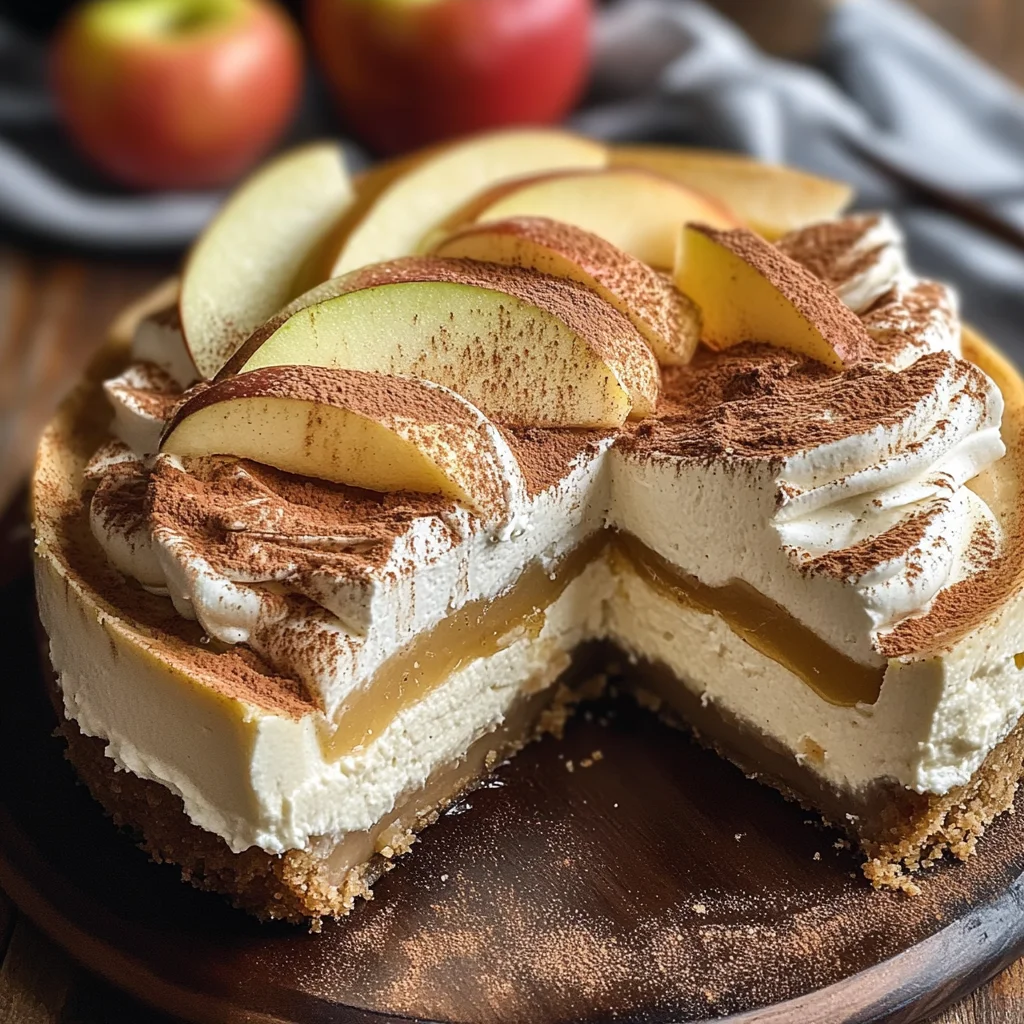
Indulge in the flavors of autumn with this creamy Apple Cider Cheesecake, a delightful dessert that perfectly captures the essence of fall. With its rich, velvety texture and tangy notes from reduced apple cider, this cheesecake is an instant classic for family gatherings or cozy evenings at home. Easy to prepare and even easier to enjoy, you can make it ahead of time, allowing the flavors to meld beautifully while you spend more time with loved ones.
Ingredients
- 2 cups digestive cookies or graham crackers
- ½ cup melted butter
- 3 cups fresh apple cider
- 3 bricks cream cheese (softened)
- 1 cup brown sugar
- 1 cup sour cream
- 3 large eggs
- 2 tablespoons all-purpose flour
Instructions
- Boil the apple cider with mulling spices in a pot on high heat for about an hour until it thickens into syrup.
- Preheat your oven to 350°F. Blend the cookies into crumbs, mix with melted butter, salt, and powdered sugar, then press into an 8” springform pan. Bake for 10 minutes.
- Reduce oven temperature to 325°F. In a mixer, combine cream cheese and brown sugar until smooth. Add sour cream, vanilla, salt, cinnamon, and reduced cider mixture.
- Mix in eggs one at a time and fold in flour until just combined.
- Pour filling into the crust and bake in a water bath for approximately 90 minutes until edges are set but center is slightly wobbly.
- Allow to cool gradually in the oven with door cracked before refrigerating for at least eight hours.
Nutrition
- Serving Size: 1 slice (120g)
- Calories: 320
- Sugar: 25g
- Sodium: 270mg
- Fat: 22g
- Saturated Fat: 12g
- Unsaturated Fat: 9g
- Trans Fat: 0g
- Carbohydrates: 30g
- Fiber: 1g
- Protein: 6g
- Cholesterol: 85mg